ToolBar を使う|Android開発
Android5.0で導入されたToolBarの使い方です。久々に開発するとActionBarと混乱してました。ざっくり言うと
ActionBarはレイアウトに記載しなくても表示されるToolBarは自分でレイアウトに追加する
ToolBarは自分でレイアウトに追加する分、カスタマイズやActivity毎の表示・非表示が可能になります。
ToolBar を表示する
準備
- res\values\styles.xmlに
NoActionBarを継承したテーマを作成します
<resources>
    <!-- Base application theme. -->
    <style name="AppTheme" parent="Theme.AppCompat.Light.NoActionBar">
        <!-- Customize your theme here. -->
        <item name="colorPrimary">@color/colorPrimary</item>
        <item name="colorPrimaryDark">@color/colorPrimaryDark</item>
        <item name="colorAccent">@color/colorAccent</item>
    </style>
</resources>
AppThemeは任意のテーマ名です。
- AndroidManifest.xmlで
<application>のandroid:themeに作成したテーマ名を指定します
<application
    android:allowBackup="true"
    android:icon="@mipmap/ic_launcher"
    android:label="@string/app_name"
    android:roundIcon="@mipmap/ic_launcher_round"
    android:supportsRtl="true"
    android:theme="@style/AppTheme">
Activityのレイアウトファイルに記述する場合
- レイアウトルートの一番目に
android.support.v7.widget.Toolbarを追加します
<?xml version="1.0" encoding="utf-8"?>
<android.support.constraint.ConstraintLayout
    xmlns:android="http://schemas.android.com/apk/res/android"
    xmlns:app="http://schemas.android.com/apk/res-auto"
    xmlns:tools="http://schemas.android.com/tools"
    android:layout_width="match_parent"
    android:layout_height="match_parent"
    tools:context=".MainActivity">

    <android.support.v7.widget.Toolbar
        android:id="@+id/my_toolbar"
        android:layout_width="match_parent"
        android:layout_height="?attr/actionBarSize"
        android:background="?attr/colorPrimary"
        android:elevation="4dp"
        app:titleTextColor="@color/textColorOnPrimary"
        app:theme="@style/ThemeOverlay.AppCompat.ActionBar"
        app:popupTheme="@style/ThemeOverlay.AppCompat.Light">
    </android.support.v7.widget.Toolbar>

<!-- 省略 -->

</android.support.constraint.ConstraintLayout>
- Activityの
onCreate()でsetSupportActionBar()をコールし、ToolBarをActionBarとして動作するようにします
Toolbar toolbar = findViewById(R.id.my_toolbar);
setSupportActionBar(toolbar);
ソースコードで動的に追加する場合
複数の画面で同じToolBarを使用する場合などはこちらが便利です。
ToolBarのレイアウトファイルを作成します
my_toolbar.xml
<?xml version="1.0" encoding="utf-8"?>
<android.support.v7.widget.Toolbar
    xmlns:android="http://schemas.android.com/apk/res/android"
    xmlns:app="http://schemas.android.com/apk/res-auto"
    android:id="@+id/my_toolbar"
    android:layout_width="match_parent"
    android:layout_height="?attr/actionBarSize"
    android:background="?attr/colorPrimary"
    android:elevation="4dp"
    app:title="@string/app_name"
    app:titleTextColor="@color/textColorOnPrimary"
    app:theme="@style/ThemeOverlay.AppCompat.ActionBar"
    app:popupTheme="@style/ThemeOverlay.AppCompat.Light">
</android.support.v7.widget.Toolbar>
- Activityの
onCreate()で下記を記述し、ToolBarを追加します
LayoutInflaterはXMLからViewを作成します。第3パラメータは第2パラメータをルートにするかどうかです
ViewGroup root = (ViewGroup) findViewById(R.id.activity_main_container).getParent();
// false=rootをmy_toolbarのルートにしない.
Toolbar toolbar = (Toolbar) LayoutInflater.from(this).inflate(R.layout.my_toolbar, root, false);
root.addView(toolbar, 0);
setSupportActionBar(toolbar);
- Activtyのコンテンツ部分に
ActionBarの高さだけマージンを取ります
<FrameLayout
    android:id="@+id/activity_main_container"
    android:layout_marginTop="?attr/actionBarSize"
    android:layout_width="match_parent"
    android:layout_height="match_parent">
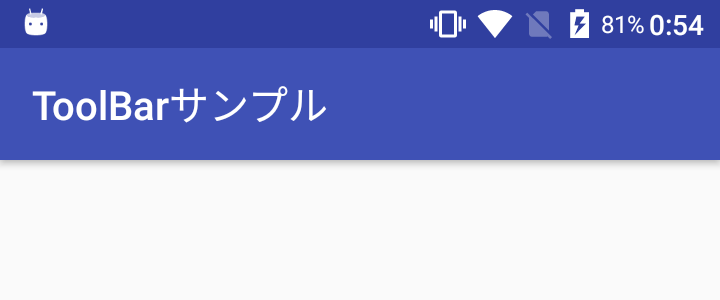
表示例
ActionBar の navigationIcon の色を変えたい場合
ActivityのonCreate()でActionBar設定後、下記をコールするとナビゲーションを表示できます。
getSupportActionBar().setDisplayHomeAsUpEnabled(true);
この時、アイコンの色は黒系で表示されます。
アイコンの色を変更したい場合はレイアウトファイルでapp:navigationIconでアイコンを指定します。
<android.support.v7.widget.Toolbar
    xmlns:android="http://schemas.android.com/apk/res/android"
    xmlns:app="http://schemas.android.com/apk/res-auto"
    android:id="@+id/my_toolbar"
    android:layout_width="match_parent"
    android:layout_height="?attr/actionBarSize"
    android:background="?attr/colorPrimary"
    android:elevation="4dp"
    app:navigationIcon="@drawable/ic_arrow_back_white_24dp"
    app:title="@string/app_name"
    app:titleTextColor="@color/textColorOnPrimary"
    app:theme="@style/ThemeOverlay.AppCompat.ActionBar"
    app:popupTheme="@style/ThemeOverlay.AppCompat.Light">
</android.support.v7.widget.Toolbar>
但し、この場合はsetDisplayHomeAsUpEnabled(true);をしなくても必ずナビゲーションアイコンが表示されるようになります。共通XMLからToolBarを生成していて、表示したくない画面がある場合はActivityのonCreate()で下記を記述します。
getSupportActionBar().setDisplayHomeAsUpEnabled(false);
ナビゲーションアイコンタップ時の処理を記述する
ActivityのonOptionsItemSelected()をオーバーライドして処理を記述します。下記は表示中のActivityを終了するサンプルです。
@Override
public boolean onOptionsItemSelected(MenuItem item) {
    switch (item.getItemId()) {
        case android.R.id.home:
            super.onBackPressed();
            return true;
    }
    return super.onOptionsItemSelected(item);
}
super.onBackPressed();の代わりに下記でもActivityが終了します。
setResult(RESULT_CANCELED);
finish();
メニューを表示する場合
ToolBarにメニューを追加する方法です。
メニューを作成する
res\menu\にメニュー定義を追加します。
toolbar_menu.xml
<?xml version="1.0" encoding="utf-8"?>
<menu xmlns:android="http://schemas.android.com/apk/res/android"
      xmlns:app="http://schemas.android.com/apk/res-auto">
    <item android:id="@+id/toolbar_menu_settings"
          android:icon="@drawable/ic_settings_white_24dp"
          android:title="@string/settings"
          app:showAsAction="always"/>
</menu>
ToolBar にメニューを追加する
ActivityでonCreateOptionsMenu()をオーバーライドし、メニューを追加します。
@Override
public boolean onCreateOptionsMenu(Menu menu) {
    MenuInflater inflater = getMenuInflater();
    inflater.inflate(R.menu.toolbar_menu, menu);
    return true;
}

メニュータップ時の処理
ActivityのonOptionsItemSelected()をオーバーライドして処理を記述します。
@Override
public boolean onOptionsItemSelected(MenuItem item) {
    switch (item.getItemId()) {
        case R.id.toolbar_menu_settings:
            Intent intent = new Intent(MainActivity.this, SettingsActivity.class);
            startActivity(intent);
            return true;
        default:
            return super.onOptionsItemSelected(item);
    }
}