TERASOLUNA (Spring) プロジェクト開発メモ
Spring MVCとTERASOLUNAについて分かったことをメモ。
Spring Framework 特徴
- 他のクラスへのアクセスはinterfaceを利用(DI)
自classのみで単体試験が可能 - AOPがある(スキーマ)

Spring構成
src/main/java
    + %base-package% // e.g. prj.sample
        + sub-package // 任意、階層自由
            + %controller-name%Controller.java // @Controller class.
        + domain
            + model
                + %model-name%.java // Entity class.
            + repository
                + %model-name%Repository.java // Repository interface.
            + service
                + ActionProcessEventListener継承クラス
                + @Serviceクラス
TERASOLUNA構成
src/main/resources
    + %base-package%.domain.repository
        + %model-name%Repository.xml // Mapping file.
    + META-INF
        + mybatis
            + mybatis-config.xml
        + spring
            + applicationContext-%SUFFIX%.xml
%base-package%はapplicationContextファイルに記述したパッケージ%model-name%は統一しないと503エラーやDB操作に失敗します- META-INF配下を
eBuilderで追加するとjugglingでデプロイしたファイルを上書きします
新規プロジェクト作成手順
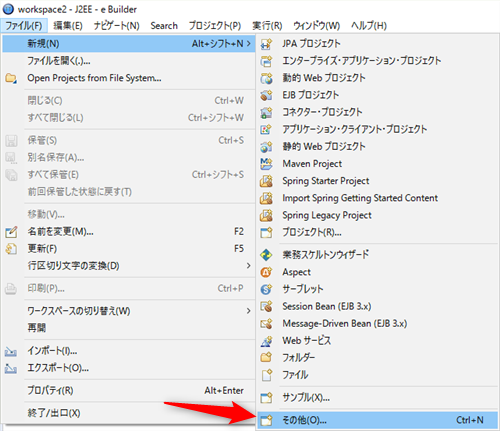
- ファイル>新規>その他
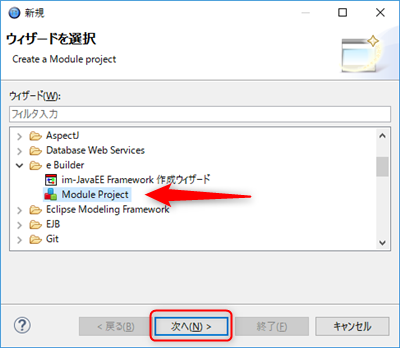
- eBuilder>Modlue Project>次へ
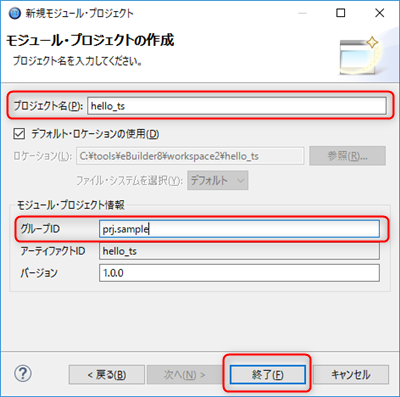
- プロジェクト名、グループIDを入力して、終了
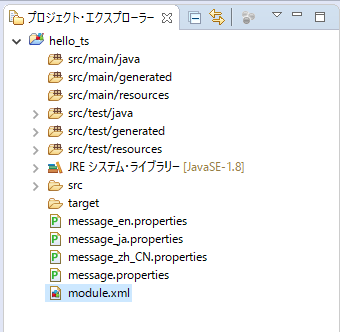
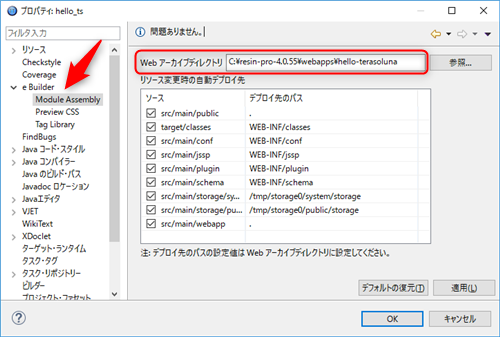
- パッケージ・エクスプローラーから作成したプロジェクトを右クリック>プロパティ
- eBuilder>Module Assembly>Web アーカイブディレクトリを設定
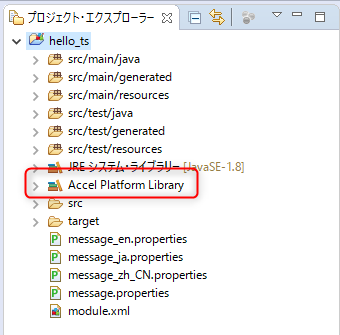
 Accel Platform Libraryが追加されます
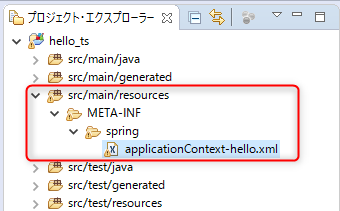
src/main/resourcesの下に/META-INF/spring/applicationContext-%SUFFIX%.xmlを作成
- この設定がないとSpringとして動作できません
- %SUFFIX%は任意
- 複数のルート(
context:component-scan:base-package)がある場合は、applicationContextファイルを複数用意します
applicationContext-hello.xml
<?xml version="1.0" encoding="UTF-8"?>
<beans xmlns="http://www.springframework.org/schema/beans"
    xmlns:xsi="http://www.w3.org/2001/XMLSchema-instance"
    xmlns:context="http://www.springframework.org/schema/context"
    xmlns:mybatis="http://mybatis.org/schema/mybatis-spring"
    xsi:schemaLocation="http://www.springframework.org/schema/beans
    http://www.springframework.org/schema/beans/spring-beans.xsd
    http://www.springframework.org/schema/context
    http://www.springframework.org/schema/context/spring-context.xsd
    http://mybatis.org/schema/mybatis-spring
    http://mybatis.org/schema/mybatis-spring.xsd">

    <!-- DIコンポーネントの対象とする要素のトップレベルパッケージ -->
    <context:component-scan base-package="prj.sample.controller" />

</beans>
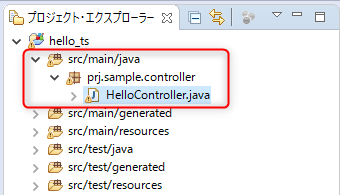
src/main/java配下にパッケージを追加
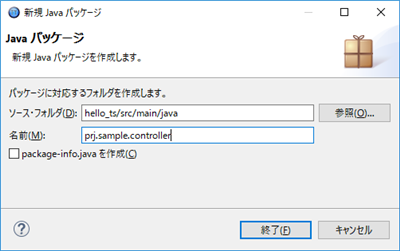
- 追加したパッケージ配下にControllerクラスを作成します
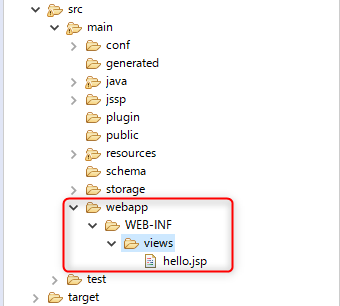
src/main/webappの下に/WEB-INF/viewsフォルダを追加し、JSPファイルを格納します
Form クラス
画面(JSP)とのデータ受け渡しを行います。
- Workflowの基本データを保持するFormクラスを作成します
→1つ作成すれば他のプロジェクトなどでも同じものを使用可 - 上記Formクラスを継承したユーザデータ保持用のFormクラスを作成します
- ユーザデータを格納するフィールドを用意します
- 合わせて、画面(JSP)でタグの名前も一致させると良いです
- 各フィールドの
getter/setterを実装します
HelloControlForm.java
package prj.sample.controller;

public class HelloControlForm {

    private String name;

    public String getName() {
        return name;
    }

    public void setName(String name) {
        this.name = name;
    }
}
Controller クラス
画面表示時の処理を実装します。
- クラス定義に
@Controllerアノテーションを記述します - クラス定義に
@RequestMappingアノテーションを記述します - 任意のメソッド定義に
@RequestMappingアノテーションを記述します- メソッドのパラメータにModelクラスを追加します
- メソッドのパラメータにユーザデータ保持用のFormクラスを追加します
- メソッドの戻り値は表示するJSPへのパス
/WEB-INF/views以降を指定します
HelloController.java
package prj.sample.controller;

import org.springframework.stereotype.Controller;
import org.springframework.ui.Model;
import org.springframework.web.bind.annotation.RequestMapping;

@Controller
@RequestMapping("app")
public class HelloController {

    @RequestMapping
    public final String index() {
        return "hello.jsp";
    }

    @RequestMapping(value = "result")
    public final String result(Model model, HelloControlForm helloControlForm) {
        model.addAttribute("previousForm", helloControlForm);
        return "result.jsp";
    }
}
ユーザデータテーブルとのマッピング定義
Workflow時に使用します。
- applicationContextファイルに
mybatis:scan:base-packageを記述します
    <!-- Mybatisのリポジトリ クラスのルートパッケージ -->
    <mybatis:scan base-package="prj.sample.domain" />
- ユーザデータテーブルの値を格納するEntityクラスを定義します
フィールド名は対応するカラムをスネークケースからCamelCaseにします
e.g.) user_data_id → userDataId - データベースに対して実行するクエリを記述したマッピングファイルを作成します
クエリの戻り値やパラメータには上記Entityクラスを指定します /META-INF/mybatis/mybatis-config.xmlにEntityクラスのTypeAliasを追加します
<typeAliases>
    <typeAlias alias="SampleTUser" type="prj.sample.domain.model.SampleTUser"/>
</typeAliases>
- マッピングファイルに指定したクエリを呼び出すためのリポジトリインタフェースを定義します
- Serviceクラスのフィールドにリポジトリインタフェースを追加し、
@Injectアノテーションを追加することで、データベース操作が行えるようになります
Entityクラス
SampleTUser.java
public class SampleTUser implements Serializable {

    private static final long serialVersionUID = 5427527524899391094L;

    private String userDataId;

    public String getUserDataId() {
        return this.userDataId;
    }

    public void setUserDataId(final String userDataId) {
        this.userDataId = userDataId;
    }
}
マッピグファイル
SampleTUserRepository.xml
<?xml version="1.0" encoding="UTF-8"?>
<!DOCTYPE mapper PUBLIC "-//mybatis.org//DTD Mapper 3.0//EN"
    "http://mybatis.org/dtd/mybatis-3-mapper.dtd">

<mapper namespace="prj.sample.domain.repository.SampleTUserRepository">

    <select id="select" parameterType="java.lang.String" resultType="SampleTUser">
        SELECT
        user_data_id as userDataId
        FROM sample_dbname
        WHERE user_data_id = #{userDataId}
    </select>

    <insert id="insert" parameterType="SampleTUser">
        INSERT
         INTO sample_dbname (user_data_id)
        VALUES (#{userDataId})
    </insert>
</mapper>
リポジトリインタフェース
SampleTUserRepository.java
public interface SampleTUserRepository {
    public void insert(SampleTUser entity);
    public SampleTUser select(String userDataId);
}
Serviceクラス抜粋
@Service
@Transactional(propagation = Propagation.MANDATORY)
public class ActionProcessServiceImpl implements IActionProcessService {

    @Inject
    private SampleTUserRepository mRepository;

    // APIなど
}
JSP
hello.jsp
<%@ page contentType="text/html; charset=UTF-8" pageEncoding="UTF-8" %>
<%@ taglib prefix="imui"   uri="http://www.intra-mart.co.jp/taglib/imui"%>
<%@ taglib prefix="form"   uri="http://www.springframework.org/tags/form" %>
<%@ taglib prefix="spring" uri="http://www.springframework.org/tags" %>

<imui:head>
  <title>Hello</title>
  <script type="text/javascript">
    $(function() {
      $('#sendButton').click(function() {
        $('#inputForm').submit();
      });
    });
  </script>
</imui:head>

<div class="imui-title">
  <h1>hello TERASOLUNA</h1>
  <form:form action="app/result" modelAttribute="inputForm">
    <div>
      <!-- テキストボックス -->
      <imui:textbox type="text" value='' id="name" name="name" size="10" />
    </div>
    <!-- submitボタン -->
    <imui:button name="sendButton" value="Send" class="mt-10" id="sendButton" />
  </form:form>
</div>
result.jsp
<%@ page contentType="text/html; charset=UTF-8" pageEncoding="UTF-8" %>
<%@ taglib prefix="imui"   uri="http://www.intra-mart.co.jp/taglib/imui"%>
<%@ taglib prefix="form"   uri="http://www.springframework.org/tags/form" %>
<%@ taglib prefix="spring" uri="http://www.springframework.org/tags" %>
<%@ taglib prefix="f"      uri="http://terasoluna.org/functions" %>

<imui:head>
  <title>Result</title>
</imui:head>

<div class="imui-title">
  <h1>result TERASOLUNA</h1>
</div>
<div class="imui-form-container-narrow">
  <label>
    <imui:textbox type="text" value="${f:h(previousForm.name)}" id="name" name="name" size="10" class="imui-text-readonly" readonly />
  </label>
</div>
TERASOLUNA標準
Action処理を行う場合の実装手順です。
JSP
- Formのactionに遷移先のURLを記述します(一般的なHTMLでの記述と同じ)
- 実行はsubmitで行います
Form クラス
画面(JSP)とのデータ受け渡しを行います。
- クラス名は任意
- 対応する入力タグと同じ名前のフィールドを用意します
- 各フィールドの
getter/setterを実装します
Controller クラス
- 画面とデータ受け渡しを行いたい場合、JSPで遷移先に指定されたURLにマッピングされたメソッドのパラメータに上記Formクラスを追加します
- Springの
@ModelAttributeアノテーションは不要です - 直接URLを指定してページを開いた場合、Formインスタンスは存在しますが、プロパティが
nullとなります
- Springの
- 画面に情報を渡したい場合、メソッドのパラメータにModelを追加します