オリジナルのウィジェットを追加する|WordPressテーマ作成
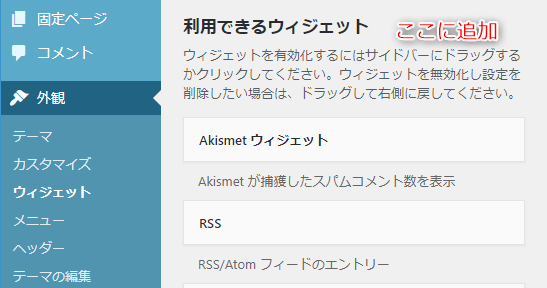
外観>ウィジェット>利用できるウィジェットにカスタムウィジェットを追加する方法です。
ウィジェットの作成
functions.phpにWP_Widgetを継承したclassを定義します
このクラスがウィジェットとして追加されます- コンストラクタでID、表示名、概要を指定します
function __construct() {
    parent::__construct(
        'theme_xxxx_widget_id001',    // ID.
        __( 'カスタム Widget' ),    // 表示名.
        array( 'description' => __( 'カスタム Widget の説明' ), )    // 概要.
    );
}
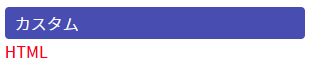
表示イメージ
widgetメソッドでWidget実行時の出力を記述します
第1引数はウィジェットの引数です。register_sidebarの値が取得できます
第2引数はデータベースに保存されているウィジェットの値です
public function widget( $args, $instance ){
    echo $args['before_widget'];

    if ( !empty( $instance['title'] ) ) {
        echo $args['before_title'] . apply_filters( 'widget_title', $instance['title'] ) . $args['after_title'];
    }

    $dest_html = !empty( $instance['setting_html'] ) ? $instance['setting_html'] : '';
    echo $dest_html;

    echo $args['after_widget'];
}
register_sidebarについては、
独自サイドバー(サイドバーウィジェット)の追加方法|WordPressテーマ作成
を参照ください。
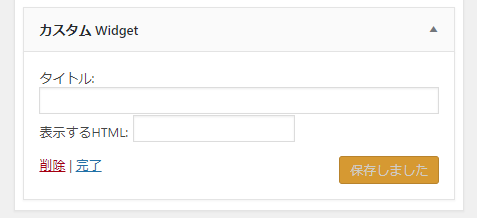
formメソッドで管理画面でのフォーム出力を記述します
第1引数はデータベースに保存されているウィジェットの値です
フォームに指定するid属性、name属性はそれぞれ$this->get_field_id( 'キー名' )、$this->get_field_name( 'キー名' )で指定しなければなりません。
public function form( $instance ) {
    $title = !empty( $instance['title'] ) ? $instance['title'] : '';
    $current_html = !empty( $instance['setting_html'] ) ? $instance['setting_html'] : '';
    ?>
    <p>
        <label for="<?= $this->get_field_id( 'title' ); ?>"><?php _e( 'タイトル:' ); ?></label>
        <input class="widefat" id="<?= $this->get_field_id( 'title' ); ?>" name="<?= $this->get_field_name( 'title' ); ?>" type="text" value="<?= esc_attr( $title ); ?>">
        <label for="<?= $this->get_field_id( 'setting_html' ); ?>"><?php _e( '表示するHTML:' ); ?></label>
        <input id="<?= $this->get_field_id( 'setting_html' ); ?>" name="<?= $this->get_field_name( 'setting_html' ); ?>" type="text" value="<?= esc_attr( $current_html ); ?>">
    </p>
    <?php
}
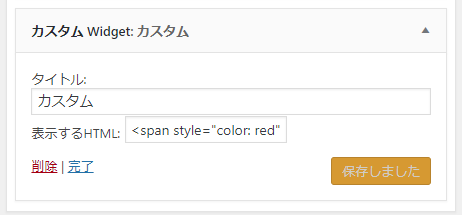
表示イメージ
updateメソッドで保存処理を記述します
第1引数は新しくフォームに入力された値
第2引数はデータベースに保存されている前回の値です
戻り値として返した配列が実際に保存されます
public function update( $new_instance, $old_instance ) {
    $instance = array();
    $instance['title'] = !empty( $new_instance['title'] ) ? strip_tags( $new_instance['title'] ) : '';
    $instance['setting_html'] = !empty( $new_instance['setting_html'] ) ? $new_instance['setting_html'] : '';

    return $instance;
}
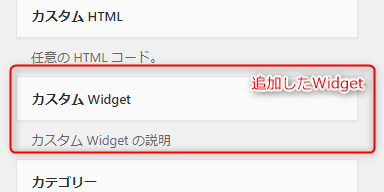
利用できるウィジェットの追加
functions.phpでwidgets_initフックを使い、register_widget()で作成したウィジェットを追加します。
add_action( 'widgets_init', function() {
    register_widget( 'My_WP_Widget' );
} );
サンプル
<?php
class My_WP_Widget extends WP_Widget {
    /**
     * ウィジェット名などを設定.
     */
    function __construct() {
        parent::__construct(
            'theme_xxxx_widget_id001',    // ID.
            __( 'カスタム Widget' ),    // 表示名.
            array( 'description' => __( 'カスタム Widget の説明' ), )    // 概要.
        );
    }

    /**
     * ウィジェットの内容を出力.
     *
     * @param array $args ウィジェットの引数.
     * @param array $instance データベースの保存値.
     */
    public function widget( $args, $instance ){
        echo $args['before_widget'];

        if ( !empty( $instance['title'] ) ) {
            echo $args['before_title'] . apply_filters( 'widget_title', $instance['title'] ) . $args['after_title'];
        }

        $dest_html = !empty( $instance['setting_html'] ) ? $instance['setting_html'] : '';
        echo $dest_html;

        echo $args['after_widget'];
    }

    /**
     * 管理用のオプションのフォームを出力.
     *
     * @param array $instance データベースからの前回保存された値.
     */
    public function form( $instance ) {
        $title = !empty( $instance['title'] ) ? $instance['title'] : '';
        $current_html = !empty( $instance['setting_html'] ) ? $instance['setting_html'] : '';
        ?>
        <p>
            <label for="<?= $this->get_field_id( 'title' ); ?>"><?php _e( 'タイトル:' ); ?></label>
            <input class="widefat" id="<?= $this->get_field_id( 'title' ); ?>" name="<?= $this->get_field_name( 'title' ); ?>" type="text" value="<?= esc_attr( $title ); ?>">
            <label for="<?= $this->get_field_id( 'setting_html' ); ?>"><?php _e( '表示するHTML:' ); ?></label>
            <input id="<?= $this->get_field_id( 'setting_html' ); ?>" name="<?= $this->get_field_name( 'setting_html' ); ?>" type="text" value="<?= esc_attr( $current_html ); ?>">
        </p>
        <?php
    }

    /**
     * ウィジェットオプションの保存処理.
     *
     * @param array $new_instance 保存用に送信された値.
     * @param array $old_instance データベースからの以前保存された値.
     *
     * @return array 保存される更新された安全な値.
     */
    public function update( $new_instance, $old_instance ) {
        $instance = array();
        $instance['title'] = !empty( $new_instance['title'] ) ? strip_tags( $new_instance['title'] ) : '';
        $instance['setting_html'] = !empty( $new_instance['setting_html'] ) ? $new_instance['setting_html'] : '';

        return $instance;
    }
}

add_action( 'widgets_init', function() {
    register_widget( 'My_WP_Widget' );
} );
設定例
出力例